
We arrived at the Northwest Maritime Center Boatshop at a bit past 8:30 am. The canoe was waiting for us. Every time I see it, I have to take a minute to admire the texture, lines, and shape of this beautiful boat. I remind it how pretty it is; talking to inanimate objects is a trait I inherited from my mother.
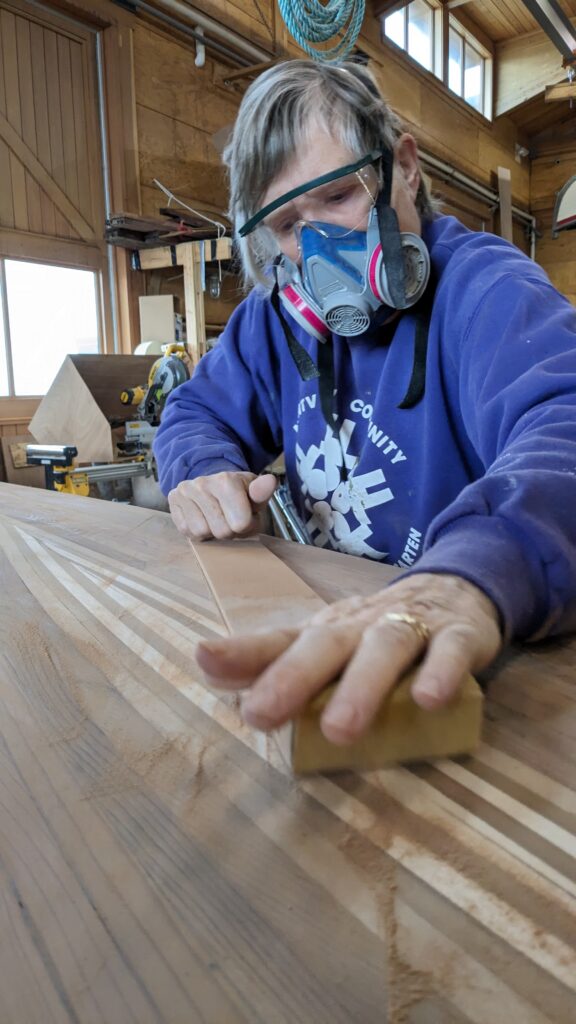
Our first task is to sand out the blemishes and bumpy spots. We use a fairing board, which is nothing more than a long, flexible piece of board with sandpaper. Janell loves to do this; it is satisfying work and progress is immediate and obvious. We’ve been told cedar sawdust is toxic and sanding produces a lot of it. Janell wears proper personal protection: safety glasses and a respirator.
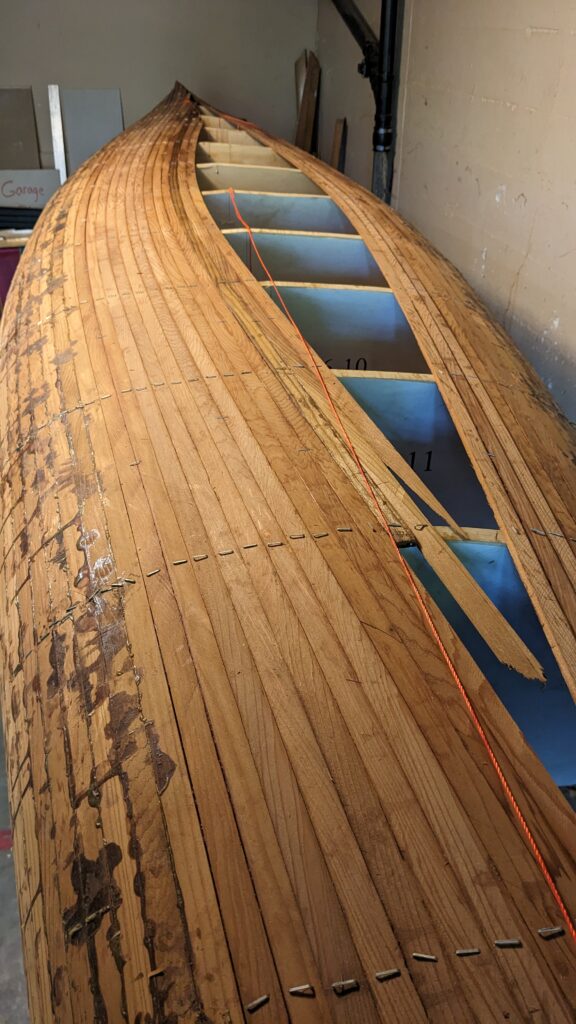
The picture to the right shows how this cedar strip canoe was made. Stations are the horizontal forms holding the strips in place. Strips run from one end to the other end of the boat. Each one is glued in place next to the previous strip. Hence the name, strip canoe. As we laid them in place we suspected there were gaps between the strips.
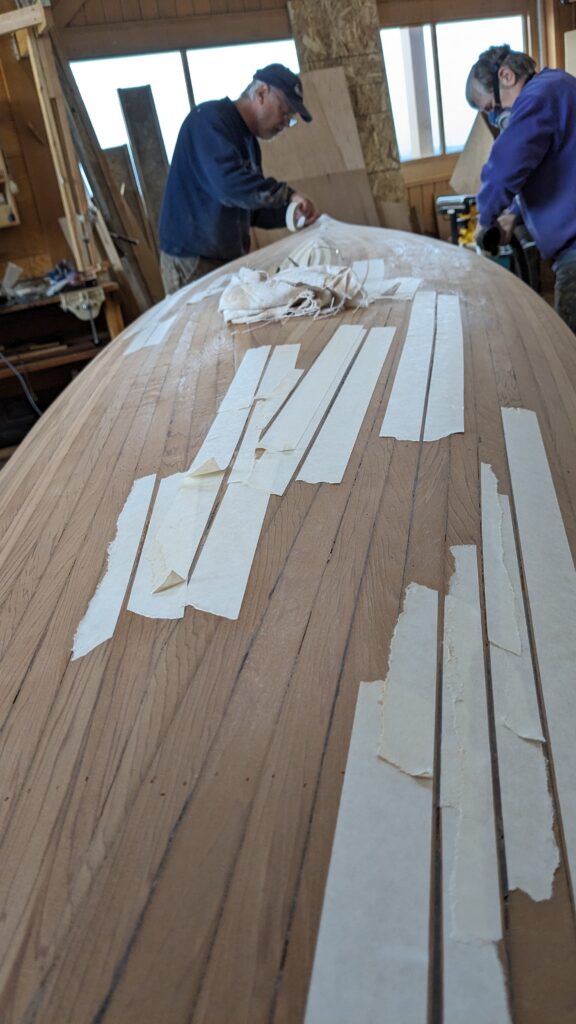
The next step is applying a sealer coat of epoxy. But first, we have to seal those cracks. If you lay under the canoe with a bright light, the cracks become obvious to anyone looking from above. Sealing is a simple process: first, we apply masking tape to EVERY crack, then apply resin, then squeegee out the resin, and then remove the tape. As we mask each crack, the boat becomes less cedar and more tape; it looks like someone did a bad job of shaving. The next time we build a boat (the next time??!?!) we will be more careful about matching each strip to the next. I’m not sure that will make a difference, but we will spend more time fussing about placement.
This is one of those times Janell and I remind each other how we are making mistakes and then finding ways to correct those mistakes. We are skating along with minimal knowledge and lots of books with lots of different advice on how to build a boat. We’re bound to do things wrong. But we’ve been good about permitting ourselves to fail.
For example: We used staples to attach the strips to the stations while the glue between the strips dried. Pulling those staples out left a row of obvious holes. Rather than declaring them blemishes, we’ve decided they are a mark of authenticity; we built this boat, and we did not buy it from a store!
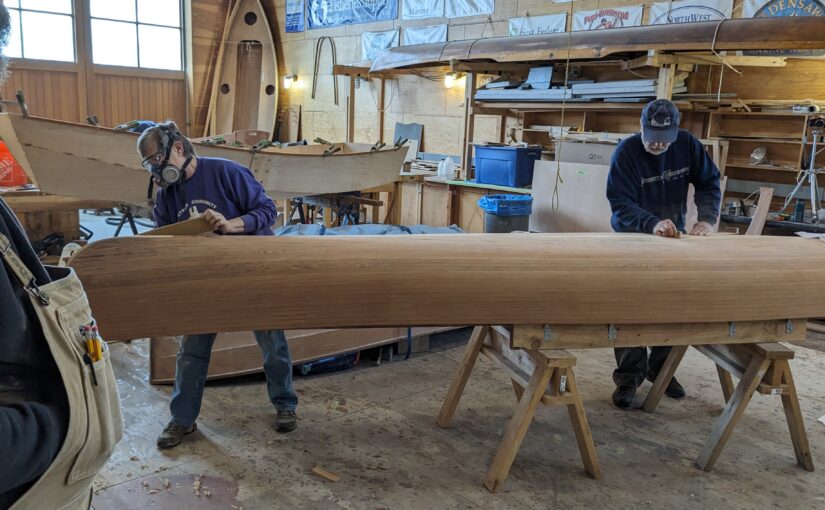
Another imperfection is the strips on the bow and stern. Strip canoes solve the problem of the end of the strips in several ways. We chose to curve and laminate thin strips, and then shape them to the lines of the boat. It turns out the result is too angular and is lower than the bottom of the boat. This will cause odd tracking when the boat is paddled, so needs to be evened out. I captured a pleasing video of Rich using a block plane to smooth the lines.
Rich is using a plane I inherited from my father. I remember the pair of snowshoes he built from scratch; he used that plane to buff off the sharp corners of the bentwood frame. Dad would have been pleased to see how the plane is being used by skilled hands.
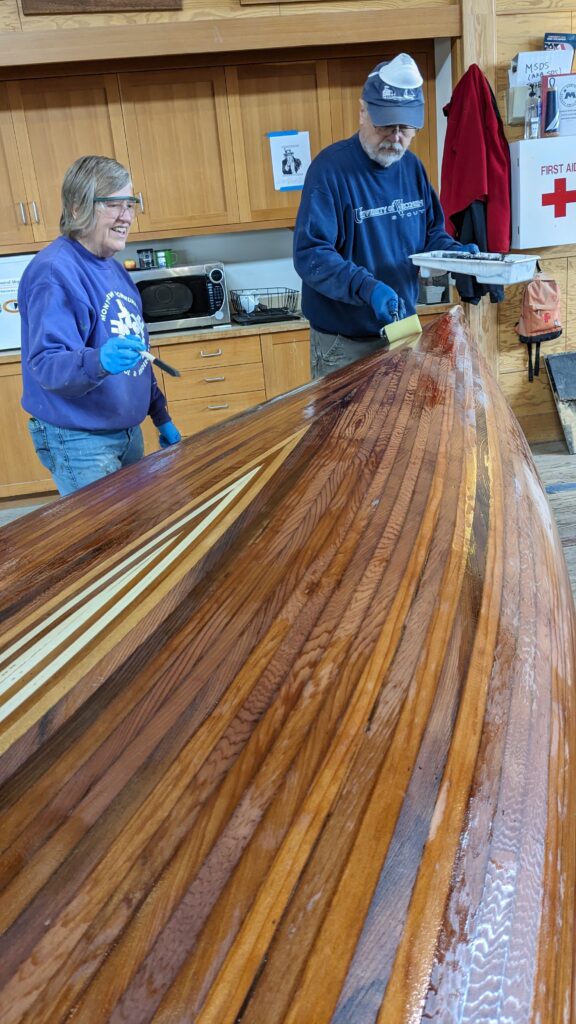
After letting the filler dry during lunch, we returned to more sanding and final touches. Then…epoxy. This is a bit scary because once the epoxy is brushed on, it cannot be removed. It will be whatever it is and there is no turning back.
The color of the boat emerges as we brush on the epoxy. The change from light brown to deep red is dramatic and a bit unexpected. Earlier, we had a similar experience when we removed the glue residue. As we scraped and sanded off the glue, the true form of the boat emerged. It’s why I tell the boat how pretty it is.
Special bonus: We cut gunwales
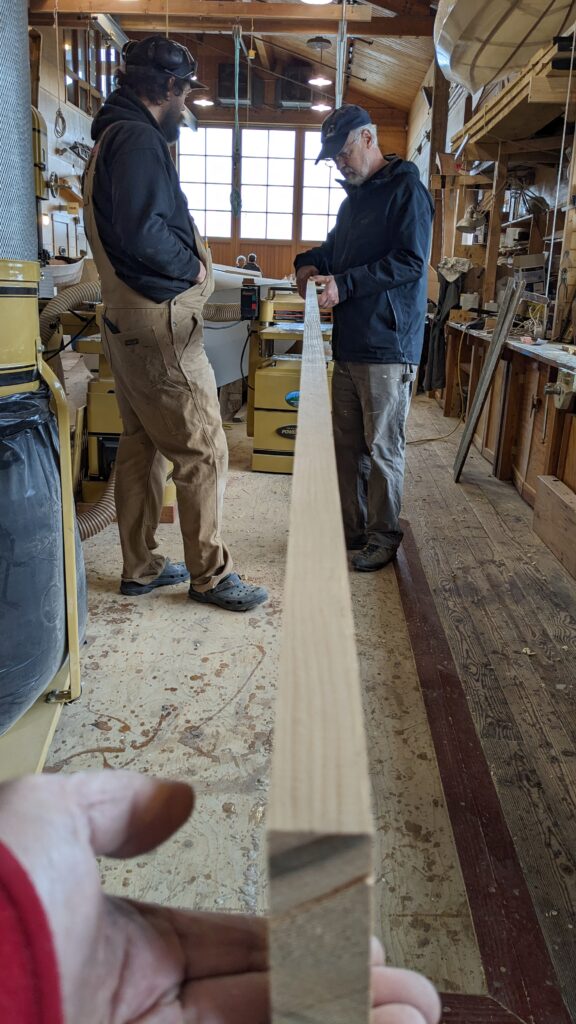
Before we left for the evening Joel, the shop manager, found a twenty-foot piece of spruce which we cut into gunwales. Where do you find a 20-foot piece of clear spruce? Not something normally in stock at Home Depot. But Joel has stuff like this lying around the shop.
It’s an awkward size and we have to move things around so we have twenty feet in front of and behind each piece of machinery. Kids, don’t try this in your basement!
This evening, Rich, Janell, and I are having curry for dinner. The boat is quietly curing. Tomorrow we add the first layer of fiberglass.
Here is our day
I set up a camera to create a time-lapse of our day. The two-minute video shows nine hours of work. You can see us sand, vacuum, and apply resin. Watch for my appearance as the creator of wood flour used to fill the cracks.