My urban garden needs irrigation during the summer months. The simple solution is to use commercially available irrigation timers; they turn on, then turn off. Simple enough. They cost about thirty dollars.
If you forget to bring them in during the winter, they freeze and break. After a few years, the plastic valves wear out and they jam closed (bad for plants) or jam open (bad for water bills). They don’t adjust to rain or hot weather.
You can buy more robust timers. Some of them have Internet connectivity and look up the weather forecast. They cost about $100. If you leave them outside, they freeze and break.
Or… You can use your knowledge of raspberry pi and the assortment of parts in the electronics box to build your own.
Raspberry Pi Zero
I chose a Raspberry Pi for three reasons:
- I need internet connectivity if I am going to look up weather reports.
- My preferred language is R, which I can run from a linux operating system, but not from micropython or C
- I have several Raspberry Pi’s gathering dust in my office. I should use them.
I am using a Raspberry Pi Zero WH. The wireless makes it easy to connect to the internet and the headers provide a convenient way to connect relays and buttons.
The Bits
This project requires a mix of a lot of parts:
- The Raspberry Pi controller
- Designing the logic to convert the desired amount of water balanced against rainfall (measured in inches) into seconds to hold the valves open to deliver irrigation water (measured in gallons per hour)
- Programming the logic in R
- Controlling relays to control the voltage required by the irrigation valves
- Plumbing the flow of water from house lines through irrigation valves and out to the drip irrigation system
- Raspberry Pi Zero WH: $10?
- Relays: $7 x 2 = $14
- Irrigation Valves: $15 apiece
- Random PVC: $25?
- Power box, transformer, assorted parts: $25
I’ve documented the existing tool at https://github.com/mnr/sprinklR/wiki . This includes lots of photos
There is a dashboard showing performance at https://niemannross.com/sprinklR
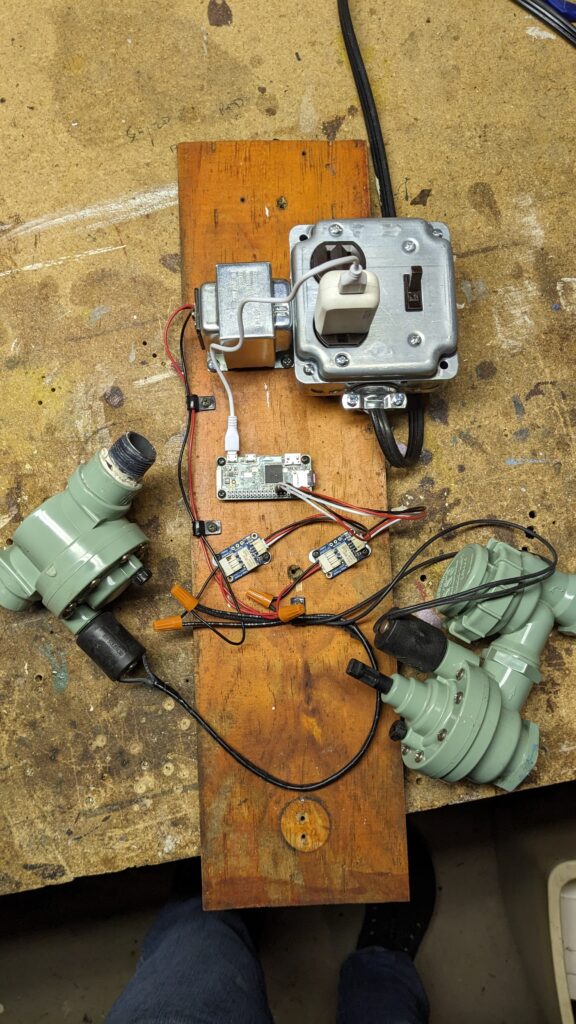
This photo shows the development board. It’s just a piece of scrap wood with components temporarily screwed in place. At the top is the power for Raspberry Pi and irrigation valves. In the middle is the Raspberry Pi Zero, below that is the two servos used to control the irrigation voltage, and below that is the irrigation valves.

There isn’t any water connected to the system at this point – I’m only trying to test the electronics and develop and test the code. In particular, I’m trying to see if the software & hardware are providing realistic results. I don’t want to give it access to my water bill until I’ve reality checked its performance.

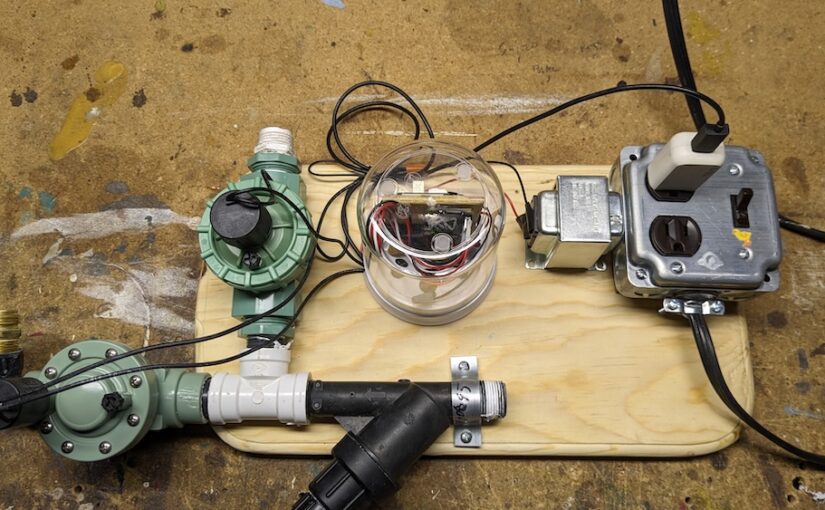
Here is an overall picture of the three parts on the finished board. Left: Irrigation valves and plumbing, Center: Raspberry Pi and relays, Right: power.
Notice I’ve moved the project to a larger and more formal board. This shape was more suited to the layout of the parts. I wanted the plumbing to be physically below power and the Raspberry Pi in case there was a leak.

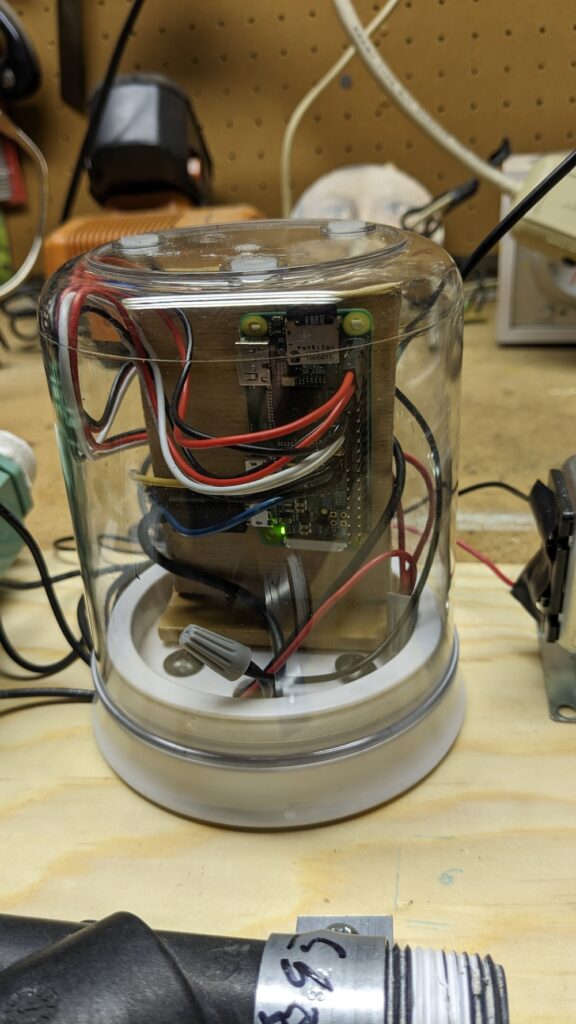
This is a closeup of the raspberry pi. I’ve housed this in a mason craft food preservation container. Costs about $3 and is waterproof – hopefully something I don’t need.
The board chassis attaches the base of the container and includes a hole for feeding wires through a notch in the base and up to the RPi. Access is by pulling off the jar – it’s held on by a gasket. Because the RPi Zero uses so little energy, cooling is not a problem.
Software
I run this on linux – my programming language of choice is R. The code constantly changes – thank god for git and github. I do a lot of development on a Macintosh, then push to github. I ssh into the Raspberry Pi and pull from github to update the running code. This gives me a slight buffer from the online system, and github provides me with a backup should the memory chip in the RPi fail.
Links
- Github Repository: https://github.com/mnr/sprinklR
- Wiki documentation: https://niemannross.com/link/irrigation
- Support for R access to Raspberry Pi GPIO: https://github.com/mnr/rpigpior
- R for the Raspberry Pi family of computers: https://r4pi.org/
- Relays: Adafruit Non-Latching Relay. https://www.adafruit.com/product/4409

